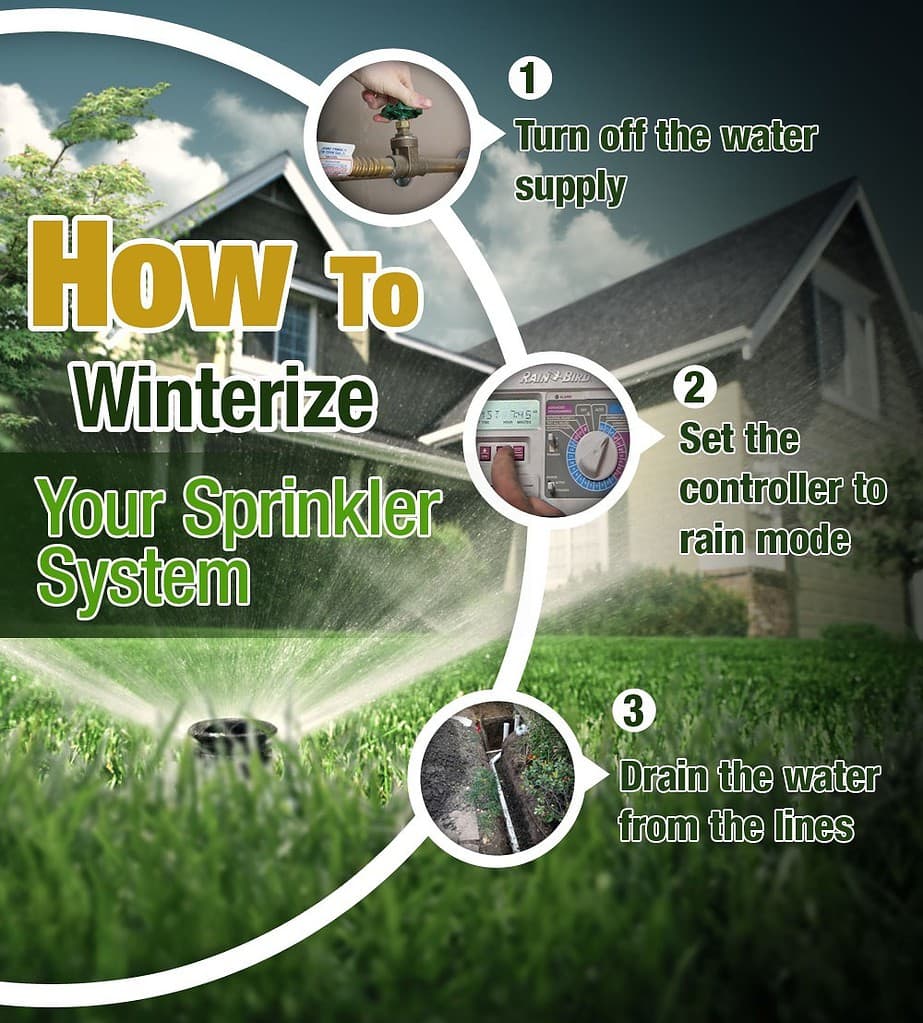
Even though the likelihood of deep freezing temperatures and heavy snow is usually very small in North Texas, it is still a good idea to winterize your sprinkler system by the time winter arrives. This will help avoid any damage to your system just in case unusually cold weather hits. Water left in irrigation lines or valves can freeze and expand, which can cause them to split or burst. Turning your system on in spring may reveal a nasty surprise if the water left in the irrigation lines or valves froze and caused them to split or burst. Burst pipes can cause flooding, significant same to your home’s plumbing system, and much more.
Where to Start
Maybe you’ve never wondered how to winterize your sprinkler system, but a major threat to your sprinkler system during winter is freezing. As residual water inside the pipes, valves, and other components freeze and expands, it can rupture or deform sprinkler components and lead to major problems or leaks in the spring. The “frost line” at a certain depth is believed by some homeowners to insulate buried sprinkler pipes from freezing. In many parts of the country, though, the frost line is located as deep as three or four feet below the surface. Since most sprinkler pipes are installed at a shallower depth, they become vulnerable to freezing and the resulting damage.
In order to winterize a sprinkler system, it is important to first know what type of system you have. In this article, we will touch on both the most basic steps of sprinkler winterization and the more specific methods based on your system type.
How to Winterize Your Sprinkler System
Turn Off the Supply

First, cut off the water to the entire sprinkler system. A properly installed system should have a main water shutoff valve in a sheltered location to protect it from freezing, such as a basement or crawl space. Insulate the shutoff valve for the winter if it is outdoors and exposed to freezing temperatures after turning off the water. You can insulate the shutoff valve for the winter by covering it with a plastic bag and wrapping it with foam insulation tape.
Set the Controller
There are two options to winterize the system controller. Many controllers have a rain mode that essentially stops the signals to the valves. While in rain mode, the controller will still have the correct date and time and keep track of all the programmed settings. The only difference from regular mode to rain mode is that your valves don’t turn on – everything else stays the same.
As an alternative to leaving the controller in rain mode all winter, simply unplugging the power to the controller will also stop all valve activity. When spring arrives, however, you’ll need to reprogram the controller for the correct date, time, and settings.
Remove the Water
The next step is to drain the water from your sprinkler system, which may include one of the following methods
- The system may be drained manually. To perform this method, one needs to manually open drain valves located at the lowest points of the system and at the termination point to allow water to drain. To drain the backflow device, the professional will open the test valve. Then, they will use a separate valve to drain the water in the span between the main sprinkler shut-off valve and the backflow device.
- If a system incorporates automatic drain valves, these valves typically open when pressure in the system drops below 10 p.s.i. After shutting off the main water valve, a sprinkler contractor will activate a single sprinkler to relieve residual system pressure. The drain valves will automatically open and empty the lines.
- Blowing water out of the pipes with compressed air is another method, usually reserved for more complex systems where water cannot be fully removed through drains. This option requires high-pressure air compressors specifically designed for this use. A qualified sprinkler contractor should handle the process as it can be hazardous for untrained individuals. They must blow out spans of pipe in a specific sequence according to the overall layout, ensuring total removal of water.
3 Methods to Winterize Your Sprinkler System
Manual Drain Valve Method
For systems with a manual drain valve:
- Turn off your sprinkler system from its mainline shut-off valve.
- Open one of the system’s control valves to relieve pressure on the mainline. This can be done manually or from the system’s control box.
- Open the manual drive valve.
- Repeat for all manual drain valves on the mainline.
You will need to remove any remaining water from the valves. You can do this by either taking apart the valves and drying the parts or blowing compressed air through your system. Replace any valves you may have removed and leave them all in the open position to prevent the system from repressurizing during the winter.
Automatic Drain Valve Method
For systems with an automatic drain valve:
- Turn off your sprinkler system from its mainline shut-off valve.
- Open one of the system’s control valves to relieve pressure on the mainline. You can do this by hand or through the system’s control box.
- Open the manual drive valve.
The automatic valves automatically remove water when your sprinkler system shuts off. Valve disassembly or compressed air blowing is still required to remove water from the valves, despite prior drainage efforts.
Blow-Out with Compressed Air Method
Consider having a professional winterize your sprinkler system if you’re unsure of how to use the compressed air blow-out method. Contact a professional contractor in North Texas if you have any doubts about doing this yourself and risk causing damage.
- Begin by shutting off the main sprinkler valve.
- Release pressure in the system by slowly opening one of the manual shut-off handles.
- Attach your compressor hose to the system’s blow-out adapter.
- Set your compressor to 50 psi, but do not turn your compressor on.
- Open the zone valve to be blown out and then turn the compressor on.
- Increase the pressure slowly until all sprinkler heads for that zone pop up.
- Allow the air to blow through for no more than two minutes.
- Turn off your compressor to allow air to purge from the irrigation line.
- Close blown-out valve.
- Repeat the above steps twice for each zone in your sprinkler system.
- Disconnect your compressor and turn the power off to your sprinkler system.
Properly winterizing your sprinkler system before winter can prevent costly repairs in the spring.

